The AEI Way: 30 Years of Safely Installing Solar Panels on Oahu
The AEI Way: 30 Years of Safely Installing Solar Panels on Oahu
Rooftop structural damage, water leaks, and electrical hazards are common fears for homeowners when installing solar panels on their island roofs. Properly installing solar panels requires precise engineering, specialized flashing, and licensed craftsmanship to withstand Oahu’s heavy trade winds and salt-air corrosion over decades of service.
Island homes face extreme tropical weather and high utility rates, making system safety and long-term hardware reliability critical for protecting your property and family. Subcontracted labor or rushed installations can compromise roof integrity, leading to costly water intrusion and severe electrical issues
In this article, you will learn how a dedicated solar panel installation process protects your home's structure while optimizing clean energy generation. You will also understand how in-house technical standards ensure flawless rooftop solar panels installation for decades of power independence. Here is how master craftsmanship ensures safe, high-performance solar power for your island home.
What Professional Solar Installation Means for Your Island Home
Properly installing solar panels is the process of securely mounting photovoltaic hardware to a building's roof structure while integrating high-voltage wiring, inverters, and circuit breakers directly into the property's main electrical grid. Rather than simply placing panels on shingles or tiles, a safe solar roof installation requires precision engineering to ensure structural integrity, leak-proof waterproofing, and safe electrical conversion.
Understanding this technical process is vital for Oahu homeowners because poor execution carries severe long-term consequences. Oahu's unique climate brings intense UV rays, persistent salt spray, tropical downpours, and severe wind gusts.
Rushing the process of installing solar panels or relying on inexperienced third-party subcontractors can lead to compromised roof trusses, moisture intrusion, and fire hazards from faulty electrical splices. Choosing a custom-engineered photovoltaic system solution ensures your home generates high-output renewable power while staying completely structurally sound.
A professional, island-tested installation delivers distinct long-term benefits:
- Structural Integrity: Specialized penetration sealing techniques prevent water damage and rot inside attic spaces.
- Electrical Safety: In-house licensed journeymen perform all wiring to handle high voltage safely and meet strict local building codes.
- Grid Resilience: Pairing rooftop arrays with modern PV storage solutions guarantees continuous power during grid outages without risking utility backfeed.
A common misconception among homeowners is that all solar mounting systems perform equally regardless of installer experience. In reality, island weather quickly exposes weak flashing and substandard racking, making expert craftsmanship the single most important factor in your system's lifetime performance.
The Step-by-Step Solar Panel Installation Process for Oahu Homes
Properly installing solar panels requires a disciplined, multi-stage engineering approach tailored specifically to Hawaii's environmental conditions. Executing a solar panel roof installation demands strict coordination between structural roofing analysis, precision mounting, and licensed electrical craftsmanship.
Below is the step-by-step solar panel installation process that ensures your system produces maximum power while safeguarding your home's structure.
Step 1: Comprehensive Site Assessment and Engineering Layout
Before any mounting hardware touches your roof, a thorough site assessment must evaluate your property's structural health and solar exposure. Island roofs face unique wear from tropical rain, high humidity, and trade winds.
- Structural Inspection: Assess roof framing, rafters, and decking to verify they can support added wind load and panel weight.
- Shading and Orientation Analysis: Map out solar irradiance patterns to determine panel placement, ensuring maximum solar capture throughout the year.
- Roof Quality Verification: Identify pre-existing shingle or tile wear. If roof repairs are needed, scheduling professional roofing services prior to panel mounting prevents having to remove and re-install equipment later.
Practical Tip: Never skip a pre-install roof inspection. Mounting heavy hardware over compromised shingles will inevitably lead to water leaks during heavy winter downpours.
Step 2: Precision Roof Penetration and Mounting Hardware Attachment
The physical process of installing solar panels on roof structures begins with attaching specialized racking systems directly to the home's internal rafters.
- Locating Structural Rafters: Use precision equipment to locate structural rafters rather than securing mounts into thin plywood decking.
- Installing All-Weather Flashing: Insert heavy-duty metal flashing underneath existing shingles at every penetration point.
- Applying Commercial Sealants: Seal all attachment points with high-grade, UV-resistant sealant designed for coastal salt air to create a permanent, watertight barrier.
Properly mounting solar panels on roof framing guarantees the array will withstand hurricane-force wind loads without compromising your home's waterproofing.
Step 3: Racking Assembly and Panel Securing
Once all mounting feet are sealed and anchored, technicians assemble the structural aluminum rail matrix that supports the photovoltaic panels.
- Rail Alignment: Level and secure anodized aluminum rails across the roof surface, maintaining proper air gaps beneath the panels to prevent heat buildup.
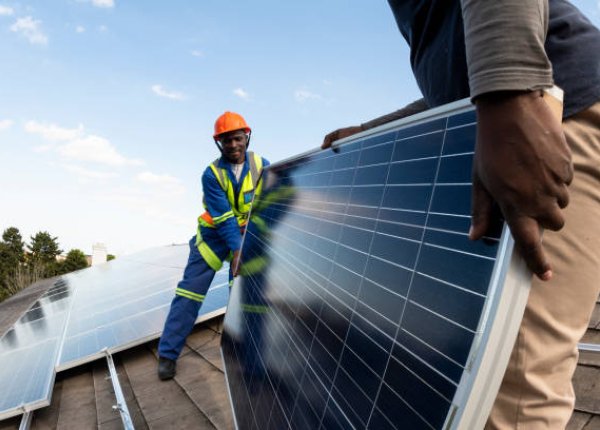
- Panel Placement: Elevate and position each high-efficiency solar module onto the racking frame.
- Hardware Torquing: Clamp panels to the rails using stainless steel hardware torqued precisely to manufacturer specifications to prevent loosening under trade-wind vibration.
Selecting custom-engineered photovoltaic system solutions guarantees that every component in the array is built to resist corrosion and degradation in coastal environments.
Step 4: Electrical Wiring and Inverter Integration
With the physical array secured, licensed electrical journeymen manage the high-voltage electrical conversion system that connects your panels to your household breaker box.
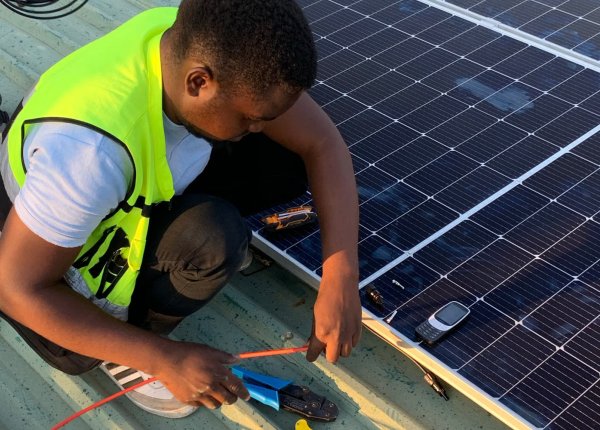
- DC Cable Routing: Run high-grade, conduit-protected direct current (DC) wiring from the rooftop array down to the inverter.
- Inverter Installation: Mount central or micro-inverters to convert raw solar power into usable alternating current (AC) electricity for your home appliances.
- Panel Interconnection: Wire the system directly into your main electrical panel using dedicated circuit breakers, ensuring full safety compliance.
If your home's main breaker box is outdated or overloaded, completing necessary electrical service upgrades during installation ensures your electrical infrastructure safely handles high-voltage solar generation.
Step 5: Utility Interconnection, Testing, and System Commissioning
The final phase transforms your completed physical hardware into an active, grid-connected power plant.
- Utility Inspection: Coordinate with Hawaiian Electric (HECO) and county building inspectors to complete mandatory safety verifications.
- System Commissioning: Power on the inverters, verify voltage metrics, and test safety shut-off mechanisms.
- Monitoring Activation: Activate online performance tracking so you can monitor real-time power production and energy savings from your smartphone.
Following this rigorous solar system installation protocol guarantees your island home benefits from clean, reliable energy backed by total structural and electrical safety.
Real-World Island Case Studies: The Impact of Professional Solar Installation
Seeing how a professional solar panel installation executes in real life demonstrates the true value of engineered safety and local expertise. Here is how Oahu homeowners benefit from an island-tested installation approach:
- Kailua (Preventing Coastal Roof Leaks): A Windward Oahu family needed to replace their aging roof while adding solar, fearing high trade winds would tear under typical mountings.
They opted for a combined roof and solar panel installation handled entirely in-house. By installing custom all-weather flashing and structural attachments directly to the rafters, their property withstood torrential winter downpours with zero leaks while dropping their monthly electric bill to the minimum connection fee.
- Kapolei (Eliminating Thermal and Electrical Strain): A Leeward homeowner had concerns that high afternoon heat and high-voltage wiring would degrade an amateur rooftop solar panels installation.
Certified in-house journeymen executed the solar panel installation process using heavy-duty conduit and properly gapped racking. This precision airflow design kept the panels cool and running at peak efficiency, successfully powering their home air conditioning throughout summer peaks without tripping breakers.
- Aiea (Safe High-Voltage Grid Upgrades): A property owner with an older electrical panel wanted a complete solar roof installation without risking fire hazards. In-house electrical professionals upgraded the main breaker panel prior to mounting the array, creating a balanced, fully code-compliant energy system.
These real-world examples prove that careful installation standards deliver lasting power independence and structural peace of mind for island property owners.
Expert Tips for a Safe, High-Performance Solar Installation
Knowing what to look for when installing solar panels helps you avoid costly structural mistakes and guarantees long-term energy savings. These field-tested insights ensure your home energy project goes smoothly from start to finish:
- Insist on In-House Licensed Journeymen: Many solar companies outsource electrical work to third-party subcontractors, leading to inconsistent craftsmanship. Relying on an in-house team of licensed electricians for your solar panel installation guarantees that all high-voltage connections meet strict county building codes and island safety standards.
- Verify Watertight Flashing and Racking Hardware: Substandard roof mounts can degrade rapidly when exposed to Oahu's salt spray and heavy rainfall. Ensure your installer uses commercial-grade aluminum racking and all-weather metal flashing when mounting solar panels on roof structures to prevent moisture intrusion inside your attic.
- Evaluate Electrical Panel Capacity Early: Adding a high-capacity solar array can overload an outdated main breaker box. Completing necessary electrical services and upgrades before laying rooftop hardware ensures your system safely handles reverse power flow without tripping main breakers.
- Plan for Future Whole-Home Energy Expansion: Sizing your mounting footprint with future upgrades in mind saves thousands in re-roofing and labor costs later. Leave adequate roof space and conduit capacity to easily add battery storage, EV chargers, or split AC units as your household energy needs grow.
Applying these proven strategies ensures your solar investment provides clean, uninterrupted power while keeping your home structurally secure for decades.
Secure Your Home's Future with Professional Solar Installation
Properly installing solar panels on your island home requires engineered mounting, watertight roof flashing, and expert electrical craftsmanship to deliver decades of safe energy savings.
You now understand how an in-house team of licensed journeymen protects your home's structural integrity while completing a seamless rooftop solar panels installation. With the right installation standards, your property is fully equipped to withstand heavy trade winds, resist salt-air corrosion, and eliminate high monthly electricity bills.
Taking action today protects your property value and allows you to capture Hawaii’s generous state and federal solar tax incentives before program terms change. Investing in professional craftsmanship gives your family total confidence in your home's safety, energy independence, and long-term financial return.
Ready to protect your roof and secure lower utility rates for decades to come? Partner with Oahu’s trusted local experts for safe, custom-engineered photovoltaic system solutions when installing solar panels on your property.
Frequently Asked Questions About Solar Installation on Oahu
How long does the solar panel installation process take for a home on Oahu?
The physical process of installing solar panels on roof structures usually takes just one to three days, depending on system size and roof complexity. However, the complete solar panel installation process—including structural site assessments, county permitting, and utility interconnection approval from Hawaiian Electric—typically spans several weeks. Partnering with experienced local installers ensures permit applications and inspections move forward without unnecessary delays.
Will mounting solar panels on roof shingles void my existing roof warranty?
Not when performed by certified professionals using proper mounting techniques. A professional solar panel roof installation utilizes engineered flashing and commercial-grade sealants specifically designed to maintain watertight integrity without voiding roof warranties. To guarantee seamless protection, consider working with certified installers who offer integrated roof and solar panel installation services under a single point of accountability.
Why is an in-house team of licensed electricians better than subcontracted installers?
Using in-house licensed journeymen for your solar system installation ensures that every high-voltage connection, inverter placement, and breaker panel integration meets rigid island safety codes. Subcontractors are often paid by speed rather than quality, which increases the risk of poor wiring and structural roof damage. In-house crews maintain consistent craftsmanship, protecting your home from fire hazards and water leaks over decades of operation.
Can my roof support a solar roof installation during heavy Oahu trade winds?
Yes. Properly engineered rooftop solar panels installation systems are designed to withstand Hawaii's extreme environmental conditions, including heavy trade winds and coastal salt spray. Technicians anchor structural aluminum racking directly into your home's internal roof rafters using heavy-duty stainless steel hardware. This structural integration ensures your panel array remains rock-solid and fully secure even during severe tropical storms.
About the Author
Ryan Malaluan, CAPM®, is an SEO & Content Strategist with over 8 years of experience in SEO, content strategy, and digital marketing. He holds a Bachelor of Arts in Literature and is a Certified Associate in Project Management (CAPM®). Throughout his career, Ryan has worked with brands including Spacer, Airtasker, Marlee (formerly Fingerprint for Success), VEED.IO, and ROSEMET LLC, as well as several digital marketing agencies, helping businesses strengthen their organic visibility through strategic, results-focused SEO and content.