Ready to Shine: How Fast Can You Actually Go Solar?
Have you ever found yourself checking your electric bill with a sense of dread, only to wonder how quickly those rooftop panels could start wiping that balance to zero? It’s a relatable struggle, the desire to switch to clean energy is often met with the uncertainty of a construction project that seems like it could take months.
The problem is that the solar panel installation timeline is often misunderstood as just the day or two spent on the roof. In reality, the physical labor is the shortest part of the journey; the true context of the timeline involves a complex dance of site assessments, engineered designs, local permitting, and utility approvals. Navigating these bureaucratic layers without a clear map can lead to frustration and a feeling that your project has stalled before it even began.
In this guide, you’ll learn the exact solar panel installation process from the first consultation to the moment you flip the switch. We will break down each phase so you can plan your home upgrades with confidence, understanding how everything from photovoltaic placement to electrical services fits into the schedule.
Let’s explore how you can set this up step by step and get your home powered by the sun.
Defining the Solar Timeline: Why the Process Matters
A solar panel installation is much more than a simple home improvement project; it is a multi-stage engineering and regulatory journey that transforms your property into a self-sustaining power plant. The solar installation timeline encompasses every step from the initial site evaluation and custom system design to the final utility interconnection. While the physical work on your roof might only take a day or two, the full going solar process typically spans several weeks to a few months, depending on your local jurisdiction and utility provider.
Understanding this timeline is vital because it allows you to manage expectations and prepare your home for a seamless transition. Without a clear grasp of the solar panel installation procedure, homeowners often feel overwhelmed by the "quiet" periods where engineers are drafting blueprints or city officials are reviewing permits. Knowing what happens behind the scenes ensures you stay informed and proactive throughout the project.
Key Benefits of Understanding the Timeline:
- Financial Planning: Helps you align your project milestones with federal tax credits and local incentive deadlines.
- Property Coordination: Allows you to schedule necessary roofing repairs or electrical services upgrades before the panels arrive.
- Reduced Stress: Eliminates the frustration of "waiting periods" by clarifying exactly which regulatory phase your project is in.
- Optimized Energy Savings: Ensures your system is ready to activate as soon as the utility grants Permission to Operate (PTO).
A common misconception is that the length of the process is due to slow labor. In reality, the most time-consuming phases occur at the desk of a permit office or utility engineer, not on your roof. By understanding these nuances, you can better navigate the path to energy independence.
The Step-by-Step Breakdown: Navigating the Solar Installation Process
A typical solar panel installation takes between 60 to 90 days from the moment you sign your contract to the day your system begins generating power. While the actual physical labor on your roof is remarkably fast, usually completed in just 1 to 3 days, the administrative, engineering, and utility approval phases account for the majority of the solar installation timeline.
Step 1: Consultation and Site Assessment
The purpose of this initial stage is to determine the technical feasibility and energy potential of your property. Once you express interest, an expert will visit your home to inspect your roof’s condition, orientation, and shading from nearby trees or buildings. They will also evaluate your current electrical panel to see if it requires any electrical services upgrades to handle the new power load. After this assessment, you will receive a customized proposal detailing the number of panels needed and the estimated energy production.
Step 2: Custom System Design and Engineering
This step transforms the site assessment data into a blueprint for your specific photovoltaic system installation. Engineers create detailed CAD (Computer-Aided Design) drawings that specify exactly where each panel, inverter, and wiring run will be placed. This plan is not just for the installers; it is a legal requirement for the permits and utility approvals that follow. If you are adding PV storage solutions, the design will also include the battery backup configuration to ensure seamless power during outages.
Step 3: Permitting and Documentation
The goal of this phase is to secure legal permission from your local government to begin construction. Your provider will submit the engineered plans to the local building department to ensure the solar panel installation procedure meets all safety and zoning codes. This is often the longest part of the how long does solar installation take equation, as it relies on the backlog of local government offices. Once the building permit is issued, your installer will also file for "interconnection" with your utility company to ensure the grid can safely accept your solar energy.
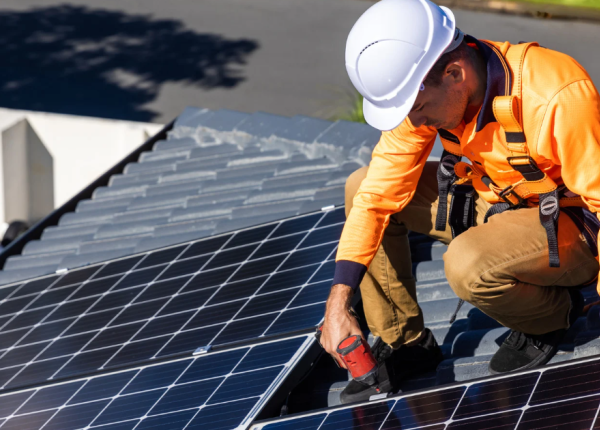
Step 4: The Physical Solar Panel Installation
After weeks of paperwork, this is the exciting day where your photovoltaic array is actually mounted. The crew will start by prepping the roof, potentially coordinating with roofing experts if minor repairs are needed, and then install the racking system. Next, the panels are secured to the racks, and the electrical wiring is connected to your inverter and home power grid. Because all the planning was done in advance, a skilled team can often finish a standard residential project in a single day.
Pro Tip: Clear your driveway and ensure the installers have easy access to your electrical panel and the attic to keep the "workday" portion of the timeline as efficient as possible.
Step 5: Inspection and Permission to Operate (PTO)
Once the panels are on the roof, the final step is to get the official "green light" to turn them on. A local building inspector will visit to verify that the solar energy installation process was followed correctly and matches the approved permits. After the city signs off, your utility company may perform their own inspection or install a new "net meter." Once the utility issues Permission to Operate (PTO), you can finally flip the switch and start saving.
Next, let's look at how this process might vary depending on your specific home and energy goals.
Solar Installation in Action: Real-World Timelines
Now that you understand the formal steps of the solar installation process, let’s see how it applies in real-world scenarios across different types of homes.
- The Proactive Homeowner: A family living in a newer suburban development wanted to maximize their savings before the summer heat. Because their roof was in excellent condition and their local permit office offered digital filing, their solar panel installation was completed in just 45 days. By coordinating early with their installer for photovoltaic placement, they avoided the usual seasonal backlog and started offsetting their cooling costs a full month ahead of schedule.
- The Comprehensive Upgrade: A homeowner with an older property decided to combine solar with several efficiency upgrades. This project required more extensive electrical services to modernize an outdated breaker box and a minor roofing reinforcement. Despite these additional layers, the integrated solar energy installation process took roughly 90 days, resulting in a home that was not only solar-powered but structurally and electrically safer for the next 30 years.
- The Resilience Focused Resident: A rural homeowner opted for a system with PV storage solutions to ensure power during frequent storm outages. This specialized configuration required an extra week for battery-specific permitting, yet the total timeline stayed within 12 weeks, providing them with total energy independence.
These examples highlight that whether you are dealing with a straightforward roof or a complex historical home, the principles of the going solar process remain effective when managed by an experienced team.
Expert Strategies to Streamline Your Solar Project
Once you have committed to the solar panel installation steps, a few expert techniques can help you navigate the timeline more efficiently and avoid common pitfalls. These insights are designed to help you stay ahead of the process and ensure your system is optimized from day one.
- Audit Your Roof and Electrical Panel Early. Before the installation crew arrives, ensure your roof has at least 10–15 years of life remaining. If you need roofing repairs or a main service panel upgrade through professional electrical services, handling these before signing the solar contract can shave weeks off your total project time.
- Consolidate Your Home Efficiency Upgrades. If you are considering energy-efficient air conditioning or solar water heating, plan them alongside your solar project. This allows engineers to size your photovoltaic array perfectly for your future energy load, preventing the need for costly system expansions later.
- Keep Your HOA and Documentation Ready. If you live in a managed community, obtain your Homeowners Association (HOA) guidelines for solar early. Providing your installer with pre-approved aesthetic requirements or neighborhood-specific forms ensures the permitting and documentation phase moves as quickly as possible without back-and-forth delays.
- Schedule a Final Walkthrough Post-Installation. Once the physical work is done, have the lead technician walk you through the system's shut-off valves and monitoring app. Understanding how to track your production immediately helps you verify that everything is running at peak efficiency the moment the utility company gives the "green light."
By applying these tips, you’ll not only improve the accuracy of your project planning but also make your transition to renewable energy more efficient and sustainable.
Conclusion: Your Path to a Powered-Up Future
Now that you have a clear understanding of the solar panel installation timeline, you can see that the journey to energy independence is a well-coordinated process of engineering and precision. From the initial site visit to the moment you receive your official Permission to Operate, each step ensures your photovoltaic system is safe, efficient, and built to last for decades.
The transition to clean energy is one of the most rewarding investments you can make for your home, and starting the conversation early is the key to beating seasonal rushes. Start implementing these preparatory steps today, the sooner you begin your consultation, the faster you’ll see those savings reflected on your energy bill.
Ready to get your custom timeline started? Contact Alternate Energy Hawaii today for a professional site assessment and let our experts guide you through every stage of the solar installation process.
Solar Installation FAQs: Navigating Your Timeline with Confidence
Planning for a solar panel installation often brings up practical questions about scheduling and logistics. To help you finalize your plans, we’ve answered the most common questions homeowners ask about the solar installation timeline in 2026.
Does adding a battery backup increase the solar installation process time?
Yes, but typically only by a small margin. Including PV storage solutions usually adds about half a day to the physical solar installation process on-site. However, the engineering and permitting phase may take an additional week, as local utilities and building departments often require specific safety diagrams and separate inspections for battery systems to ensure they meet the latest fire and electrical codes.
How much time does the physical solar panel installation actually take?
For most residential properties, the physical labor is surprisingly fast. A standard photovoltaic system installation typically takes just one to three days once the crew arrives. Most of the work on "installation day" involves mounting the racking and panels, while the remaining time is spent on the electrical services needed to connect the system to your home's main breaker and the utility grid.
Why does the permitting phase of the solar installation take so long?
Permitting is often the longest part of the going solar process because it relies on the workload of local government offices. While some jurisdictions are adopting automated platforms like SolarAPP+ to approve permits in days, others still require manual reviews that can take four to six weeks. Your installer manages this entire solar panel installation procedure for you, but they must wait for official city and utility sign-offs before they can legally begin construction.
Can I speed up the solar installation timeline by doing anything myself?
The best way to accelerate your project is to have your documentation ready. You can save days by providing your installer with 12 months of utility bills, securing HOA approval early, and ensuring your roofing is in good condition before the project starts. While you shouldn't attempt the solar installation process yourself, being a proactive homeowner helps your provider navigate the administrative hurdles much faster.