Solar Installation Process in Hawaii: A Step-by-Step Homeowner’s Guide
Switching to solar energy is one of the smartest investments homeowners in Hawaii can make. With some of the highest electricity costs in the nation and abundant sunshine year-round, solar power offers immediate savings and long-term energy independence. Even so, many homeowners hesitate because they are unsure what the solar installation process actually looks like from start to finish.
If you’ve ever wondered how solar panels go from an idea to powering your home, you’re not alone. The good news is that the process is far more straightforward than most people expect. When handled by experienced professionals, solar installation follows a predictable path that minimizes disruption and maximizes results.
This guide breaks down the solar installation process step by step, with a focus on Hawaii-specific regulations, climate considerations, and utility requirements. By understanding what happens at each stage, you can move forward with confidence and clarity.
Understanding the Solar Installation Process
At its core, the solar installation process is a sequence of coordinated steps that turn sunlight into usable electricity for your home. While every home is different, most solar installation projects in Hawaii follow the same proven framework to ensure safety, efficiency, and compliance with local codes.
This process matters because system performance, lifespan, and long-term savings all depend on proper design and installation. A well-planned installation not only improves energy production but also helps avoid permitting delays and inspection issues. That’s why working with experienced solar installers in Hawaii is such an important part of the journey.
Step-by-Step Solar Installation Process
1. Initial Solar Consultation and Energy Review
The first step in the solar installation process is a professional consultation. During this stage, a solar installation company reviews your household’s energy usage, roof layout, and overall goals for going solar.
Installers typically analyze past utility bills to understand how much electricity your home consumes and when demand is highest. This information is essential for determining the right system size and estimating potential savings. Many homeowners also use this time to learn more about how modern photovoltaic systems work by exploring options like residential photovoltaic solar solutions.
For homeowners considering residential solar in Hawaii, this consultation often includes a discussion about incentives, financing, and long-term return on investment.
2. Site Assessment and Custom System Design
After the consultation, a technician visits your home to conduct a detailed site assessment. This visit allows the installer to evaluate roof condition, shading, structural integrity, and electrical capacity.
Using this information, engineers design a system tailored to your home and Hawaii’s sun exposure patterns. If you’re interested in storing excess energy for nighttime use or outages, this is also when battery options such as PV storage solutions are typically incorporated into the design.
If the assessment reveals roofing issues, addressing them early—sometimes with professional roofing services—helps prevent complications later in the process.
3. Permitting and Utility Approvals
Permitting is one of the most important steps in the solar installation process, especially in Hawaii. Your installer submits system plans to county building departments and Hawaiian Electric to ensure compliance with local codes and interconnection requirements.
Because Hawaii’s utility programs differ from traditional net metering, system design must align with current regulations. Established solar companies in Hawaii understand these requirements and manage the entire approval process on your behalf, helping avoid unnecessary delays.
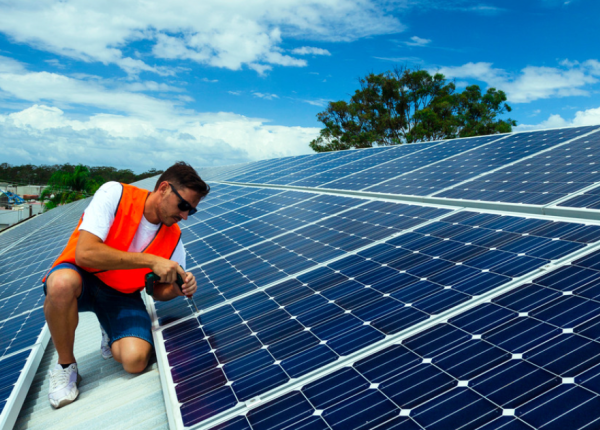
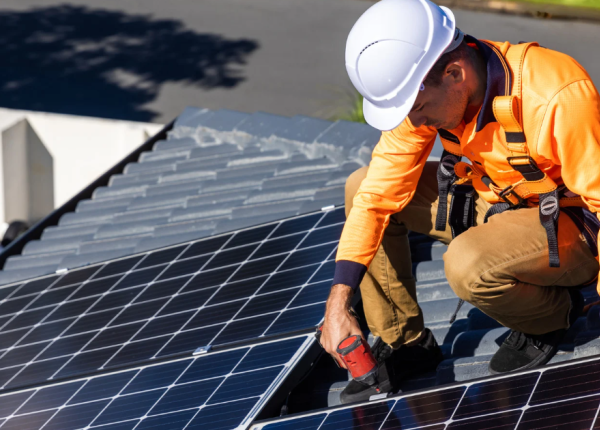
4. Solar Panel Mounting and Electrical Preparation
Once permits are approved, installation day is scheduled. This is when physical work begins on your home.
First, mounting hardware is securely attached to your roof, engineered to withstand Hawaii’s wind and weather conditions. Next comes electrical preparation, including grounding, conduit installation, and safety disconnects. Any necessary panel upgrades are handled by licensed professionals using certified electrical services.
Some homeowners choose to further reduce energy usage at this stage by upgrading to energy-efficient air conditioning, which can significantly lower overall electricity demand.
5. Solar Panel Installation and Inverter Setup
With the foundation in place, solar panels are mounted and wired together into an array. These panels capture sunlight and generate direct current (DC) electricity.
An inverter is then installed to convert that energy into usable alternating current (AC) power for your home. Homeowners planning for future transportation needs often take this opportunity to include electric vehicle charging infrastructure as part of their overall energy plan.
At this stage, the system is physically complete but not yet operational.
6. Inspection and Utility Interconnection
Before the system can be turned on, it must pass a final inspection by local authorities. Inspectors verify that the installation meets all safety and building standards.
Once approved, Hawaiian Electric issues Permission to Operate (PTO), allowing your system to connect to the grid. This step ensures the system is safe for both your household and the wider electrical network.
7. System Activation and Performance Testing
After PTO is granted, your installer activates the system and performs final performance testing. You’ll receive guidance on monitoring energy production, understanding your updated utility bills, and maintaining the system over time.
From this point forward, your home begins generating clean, renewable energy.
Real-World Solar Installation in Hawaii
For most homeowners, the full solar panel installation in Hawaii process takes between 6 and 10 weeks from consultation to activation. The majority of this time is spent on permitting and utility approvals rather than physical installation.
Some homeowners also explore emerging solar technologies to better understand the future of renewable energy, including concepts like floating solar systems and their benefits.
For independent research and comparisons, many homeowners rely on educational resources from EnergySage to better understand solar pricing, equipment, and system design.
Best Practices for a Smooth Solar Installation
To ensure a successful solar installation process:
- Work with experienced solar installers Hawaii homeowners trust
- Avoid undersizing your system as energy needs grow
- Address roofing and electrical issues early
- Understand Hawaii’s utility interconnection rules
- Review equipment and workmanship warranties carefully
These steps help protect your investment and ensure long-term performance.
Final Thoughts on Going Solar in Hawaii
The solar installation process may seem complex at first, but when broken down step by step, it becomes a clear and manageable journey. With proper planning and professional guidance, solar energy delivers long-term savings, resilience, and environmental benefits.
Whether you’re evaluating solar panel installation services in Hawaii or selecting a trusted solar contractor in Hawaii, understanding the process empowers you to make informed decisions with confidence.