Solar Installation Timeline in Hawaii: A Step-by-Step Guide From Start to Power-On
One of the first questions homeowners and business owners ask when considering solar is simple: How long does solar installation take? Understanding the solar installation timeline helps you plan ahead, avoid surprises, and move confidently from your first consultation to powering your home with clean energy.
In Hawaii, solar is a particularly smart investment thanks to high electricity rates and abundant sunshine. Still, the process involves more than just putting panels on a roof. Permits, inspections, equipment delivery, and utility approvals all play a role. Knowing how long it takes to install solar panels at each stage allows you to set realistic expectations and keep your project on track.
This guide walks you through the complete solar installation process timeline in Hawaii, explains how long each phase typically takes, and shares practical tips to help your system go live as efficiently as possible.
Understanding the Solar Installation Timeline
A solar installation timeline is the sequence of steps required to design, approve, install, and activate a solar energy system. While the physical installation itself is quick, the surrounding administrative and approval steps take more time.
In Hawaii, the full timeline usually includes:
- Initial consultation and site assessment
- System design and permit preparation
- County permitting and approvals
- Equipment ordering and delivery
- On-site installation
- Inspections and utility approval
- System activation
Depending on system size, location, and permitting speed, most residential projects take 8 to 16+ weeks from start to finish. Commercial systems can take longer.
Understanding each phase answers common questions like how long do solar panels take to install and how long does it take to get solar panels installed.
Step-by-Step Solar Installation Timeline in Hawaii
Initial Consultation and Site Assessment
Your solar journey begins with a consultation and home assessment. During this step, a solar professional evaluates whether your property is a good candidate for solar.
This assessment typically includes:
- Reviewing roof condition, orientation, and shading
- Measuring available roof space
- Analyzing past electricity usage
- Discussing goals, budget, and future energy needs
In Hawaii, this step is especially important because roofs must withstand heavy rain, trade winds, and occasional storms.
Typical duration: 1–2 weeks
Why it takes time: Scheduling visits, collecting data, and reviewing energy usage
Tip: Have recent utility bills ready to speed up analysis.
System Design and Permit Preparation
Once the assessment is complete, your installer creates a custom solar system design. This plan details:
- Panel layout and system size
- Inverter and electrical configuration
- Structural mounting details
- Integration with existing electrical systems
Designs are then packaged with permit applications required by county building departments.
Systems often include or plan for future upgrades such as photovoltaic systems, PV storage solutions, or electric vehicle charging.
Typical duration: 2–6 weeks
Why it takes time: Engineering accuracy and detailed paperwork are essential
Tip: Ask if electronic permitting is available in your county.
County Permitting and Approvals
After submission, your permit application is reviewed by the county. Officials check for compliance with:
- Building and structural codes
- Electrical standards
- Fire safety and access requirements
Each Hawaiian county has its own review timelines, which can vary.
Typical duration: 3–8 weeks
Why it takes time: Review backlogs and revision requests
Tip: Complete and accurate applications reduce review cycles.
Solar Equipment Ordering and Delivery
While permits are being finalized, your installer orders the necessary equipment:
- Solar panels
- Inverters
- Mounting hardware
- Electrical components
Supply chain conditions can affect delivery times, especially for specialized equipment or batteries.
Typical duration: 1–4 weeks
Why it takes time: Inventory availability and shipping logistics
Tip: Confirm equipment availability early to avoid install delays.
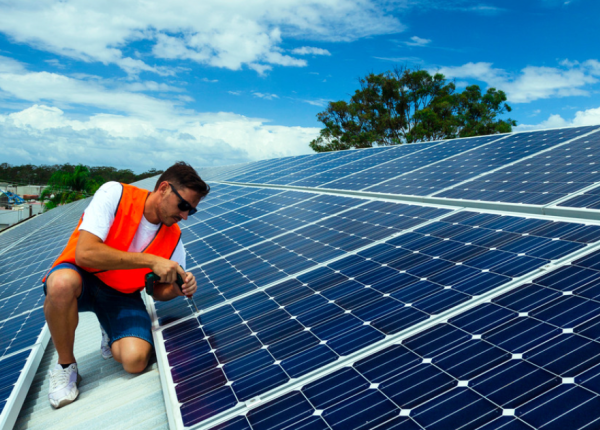
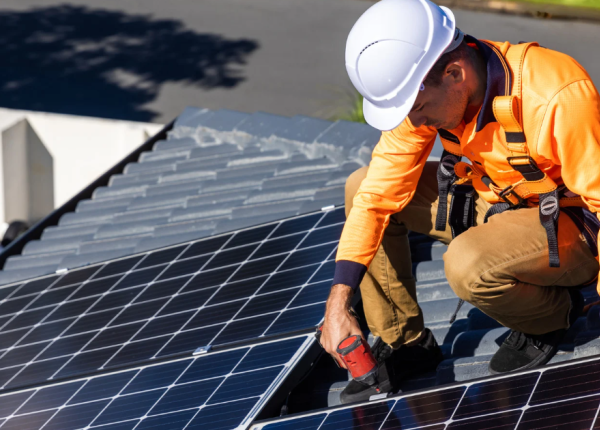
Installation Day and On-Site Work
This is the fastest part of the solar panel installation timeline. Once permits are approved and equipment is on site, installation begins.
Crews will:
- Install roof mounts and panels
- Set up inverters and wiring
- Connect the system to your electrical panel
Roof condition matters here. If repairs or replacements are needed, coordinating with roofing services beforehand prevents delays.
Typical duration: 1–3 days
Why it’s quick: Professional crews work efficiently
Tip: Ensure clear access to the roof and electrical panel.
Inspections and Utility Review
After installation, inspections verify safety and code compliance. This usually includes:
- County building and electrical inspection
- Utility review of interconnection paperwork
Inspectors may request minor corrections before approval.
Typical duration: 1–4 weeks
Why it takes time: Inspector and utility scheduling
Tip: Respond quickly if corrections are required.
Utility Interconnection and System Activation
The final step is receiving Permission to Operate (PTO) from the utility. Once approved, your system can be turned on and start producing power.
Typical duration: 1–4 weeks
Why it takes time: Utility processing and scheduling
Tip: Confirm all interconnection documents are submitted promptly.
How Long Does Solar Installation Take Overall?
For most residential projects in Hawaii:
- Total timeline: 8–16+ weeks
- Actual installation: 1–3 days
For businesses wondering how long does it take to install commercial solar panels, timelines can extend to several months due to larger system size, engineering complexity, and additional permitting.
Practical Ways to Use the Solar Installation Timeline
Knowing the solar installation timeline helps you plan around:
- Roof repairs or replacements
- Moves or renovations
- Financing milestones
- HOA approvals
- Tax credit deadlines
For example, scheduling permits before the rainy season can reduce weather delays. Planning ahead also helps coordinate complementary upgrades like energy-efficient air conditioning or solar water heating.
Tips to Speed Up Your Solar Installation Timeline
To keep your project moving efficiently:
- Gather utility bills and documents early
- Choose experienced local installers
- Respond quickly to questions and approvals
- Track permit and inspection progress
- Confirm equipment delivery dates
Working with professionals who understand Hawaii’s permitting and utility process makes a major difference. Reviewing the solar installation process in Hawaii can also help you prepare.
Conclusion: What to Expect From Your Solar Installation Timeline
A clear solar installation timeline removes uncertainty and helps you move forward with confidence. While it may take several weeks from start to activation, most of that time is spent on planning, permits, and approvals. The reward is a reliable, long-lasting solar energy system that lowers your electricity costs and increases energy independence.
By starting early, staying engaged, and working with experienced professionals, you can enjoy clean solar power sooner and with fewer delays.
Frequently Asked Questions About Solar Installation Timelines
How long does the solar installation timeline usually take?
Most residential projects in Hawaii take 8–16+ weeks from consultation to activation.
How long does it take to install solar panels on the roof?
The physical installation usually takes 1–3 days.
Can the solar installation process be faster?
Yes. Preparing documents early and working with experienced installers can reduce delays.
What affects the timeline the most?
Permitting speed, equipment availability, inspections, and utility approval.
Is inspection required before turning on solar?
Yes. Both county inspectors and the utility must approve the system before activation.